This summer Alex and I decided to start taking our show on the road. We’ve done three craft shows so far that have taught us a lot about our business and each other. I’m sure we still have a lot left to learn and already have a bunch more shows on the calendar. Here’s what I’ve learned so far.
Booth fees are more or less made up and don’t really reflect how well you’re going to do at a location. The higher the booth fee, the more profit they expect you to make, but that’s not always the case. The smaller shows we’ve done have made us quite a lot of profit too. So I try to look for reasonable booth fees or information that guarantees we’ll get our investment back in sales.
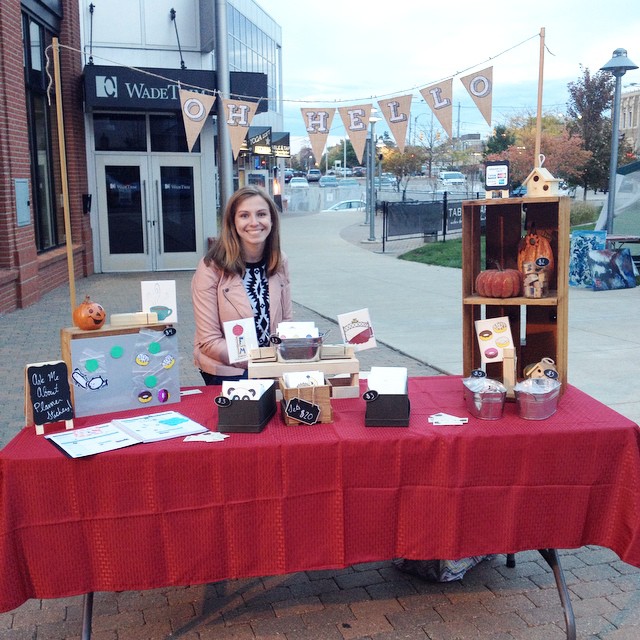
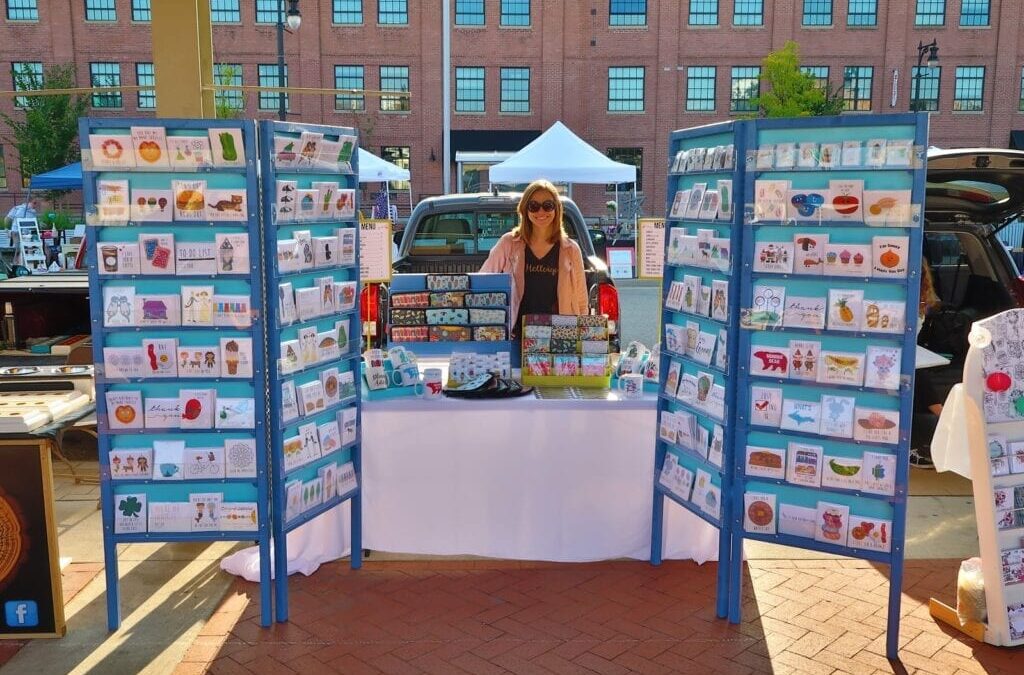
You really have to commit to your booth rather than just bringing out a table and throwing your products on it. I have to thank Alex for this one. As soon as I suggested craft shows to him, he hunted around to get us a really great deal on a tent and other supplies. Plus he built us our new card stands from scratch that have seriously made a huge difference. We could have easily kept to our first setup (photo below), but he’s constantly trying to showcase our products in the best way.
Craft show days are long and usually last all day. Our shows have been on average eight hours long so far. That’s a lot of staying in one place being on the ball, but it’s a whole lot better when you have someone there with you. Breaks are definitely needed to get up and wander around. And food is a must.
Having a partner makes all the difference. Alex is a fantastic salesman who can really do the marathon days. He has our “about us” pitch down perfectly, engages with customers, and doesn’t seem to ever get tired. Without him we wouldn’t nearly be as successful at shows. Have a partner to rely on is huge.
You get a routine with setting up and tearing down. We can be out of a location in around ten minutes after a show ends because we just know who does what. Plus we practiced it a few times before going to our first show so we wouldn’t get overwhelmed once we got there. Nothing is more stressful than a bunch of cars facing every which way trying to pack up their booths. Our first show we ended up carting our entire setup down a block to our vehicle rather than waiting another hour to get our truck in front of our booth.
Flexibility is a must because you never know what booth number you’re going to get, what the weather is going to be like, or how busy you’ll be. We’ve changed up our booth setup from what we originally planned for every single show. It’s important to not take things too seriously and be willing to change things up at a moment’s notice.
But the best thing I’ve learned from my first few craft shows is that it’s really cool to see people interact with your work in person. Since we have only ever been online before, I’ve never been able to see people laugh at our puns or enjoy Alex’s design work. It’s such an amazing experience to watch people share and relate to our cards. I don’t think that will ever get old no matter how many craft shows we do.
This photo was taken back in 2014 at the very first booth I threw together just month’s after Oh, Hello got started. It’s crazy to see just how far we’ve come. It’s also crazy that I still own both that sweater and jacket.
Are you interested in doing craft shows? What tips or advice would you like to have me write about next?
Getting your blog discovered is definitely one of the hardest parts about the blogging experience. You work so hard on creating your content that you want at least someone to see it right? Titles play a huge roll in whether or not people click to your post. Here are some of my go-to tricks to making sure my post titles are catchy and engaging.
Surprisingly enough, longer titles actually do better with search engines because there are more keywords to pick up on. So don’t be afraid to add a few extra descriptive words to help your posts pop up. So rather than writing, “My Favorite Makeup,” change the post to “The Best Everyday Makeup for Summer.” It’s more descriptive, interesting, and gives the reader more of an idea of what the post is about. Don’t go too crazy though trying to pack the title full because Google only shows 70 characters in a title before cutting it off in search results.
Readers love numbers in posts. “5 Ways to Plan,” “10 Best Blog Post Ideas” and so on make the post easier to digest and walk away with a list rather than trudging through a lot of content.
Most people search for things with “what is” and “how to,” so including those in your titles make them more search-friendly and engaging. Readers like to get something out of what they’re consuming, so giving them tips, tricks, and advice is better than rambling on about a topic.
If catchy post titles still don’t come to you, this is
my favorite resource to jump-start title creativity. Just reading that list has my brain swimming with new ideas and titles. It’s a shop secret and I’m finally sharing it with you guys! The link breaks down a ton of different post title categories so there’s something for every type of post.
What’s your go-to way of writing interesting post titles? Leave your tips in the comments!
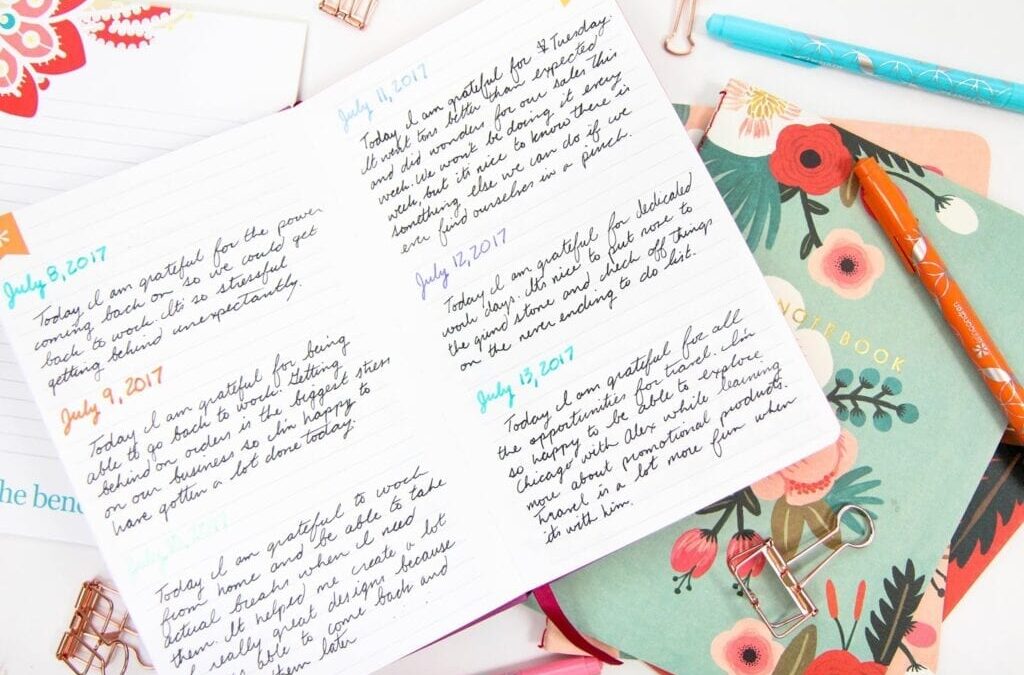
Gratitude journals are pretty much what they say on the tin, but like most things that I’ll probably love, I avoided them for ages. Two months ago I finally grabbed a spare notebook I had floating around and sat down to write a few sentences about what I was grateful for that day. What a difference it’s already made.
The thing about gratitude journals is that you don’t have to write novels every day about what you’re grateful for. It doesn’t even have to be anything overly special. More often than not I find myself writing about being grateful for Alex, but putting those thoughts down on paper has really changed my way of thinking. I’m actively expressing feelings and emotions, bringing them to the surface, and making them known to myself. That’s caused me to make them known to other people too.
Every night I grab this journal and write a sentence or two about whatever I’m grateful for that day. Just a few thoughtful words and off to bed I head. Yet when I wake up I still remembered what I wrote the night before and I find myself in a better mindset.
Putting gratitude first seems like a no-brainer, but it’s pretty hard to do on a constant basis. The gratitude journal makes it so much easier to keep thankful thoughts coming. Plus it just feels good to write happy things down rather than focusing on the bad things.
So there it is. My “ah-ha” gratitude journal moment and my not-so-subtle push for you to start one too. It’s good stuff, I’m tellin’ ya.
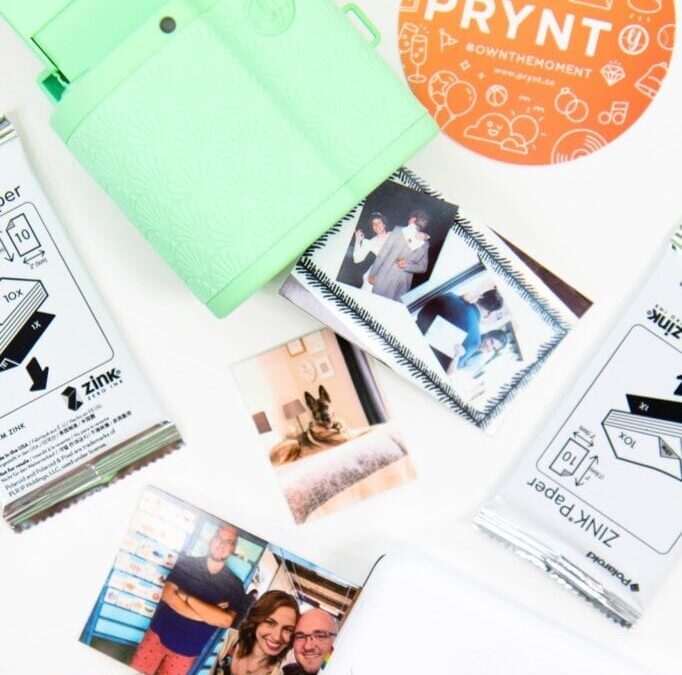
One of the best ways to snazz up a planner layout, journal, or letter is with photos. I’m the pits when it comes to scrapbooking, but adding a few photos into a layout is pretty foolproof and adds a scrapbook element that’s oh so good. There are quite a few portable photo printers out there, but I’m putting the
Polaroid Zip and the
Prynt Pocket* head to head.
Let’s start with packaging. The Zip has a smooth, sleek, and small design that uses bluetooth to connect to your phone to find photos to print. The Prynt is a bigger, bulkier alternative that attaches to your cell phone for printing. Prynt has more color options to choose from while the Zip seems more limited. Both of them use Zero Ink paper, but sadly in two different sizes which makes sharing a paper stash impossible. Both have sticker adhesive backings to their paper to make adding photos anywhere easier. I use the Prynt in
a recent vlog if you want to see it in action.
Both printers use in-phone apps to print photos and I find the Prynt one to be a lot more engaging and fun. Zip’s app is boring and dated and only serves to get the job done. It’s not an experience like Prynt is. Plus I’ve heard updates of the Zip app can be a bit finicky and crash. Good thing I’m terrible at updating my software.
Print quality is where these two really start to differ. The Zip has always printed with yellow tones for me while the Prynt is much more blue toned and more like the original photo. I’ve never worried too much about the coloration of the photos since they more for an added addition here and there, but the Prynt’s quality is definitely higher than the Zip if you’re looking for a closer match.
Yet the most important thing to make this printer worthwhile for use with planners is the ability to add multiple photos to one print. The Zip has a collage function to add as many as nine different photos on one page. The Prynt pocket doesn’t. There’s no feature to add multiple photos to a print to save paper and get smaller photos to fit into planner spreads better. A huge negative in my book.
Now to be fair, the Prynt Pocket is marketed as a tool to turn your phone into an instant camera. It’s not really intended for heavy planner or scrapbook use. It’s more as a party addition to snap some shots with friends and print them out on the spot.
Price wise the two differ about $20 with the Prynt being more expensive. I purchased my Polaroid Zip from the Erin Condren website where
you can save $10 more on the Zip if it’s your first site purchase. A $30 difference would swing my decision one way over the other, definitely when one is tailored more towards planner scrapbooking than the other.
As for which one to buy, it really depends on your main intended use. The Prynt Pocket’s photo quality beats the Polaroid Zip hands down, but it isn’t very planner friendly if you can’t adjust the size of the photos or add more to the page before printing. It is a great party addition though to snap photos with friends and instantly get a copy of them. No one prints photos anymore and being able to turn your phone into an instant camera is pretty cool.
But if you’re like me and really want to add a memory keeping element to your planning, than the Polaroid Zip is the way to go. It’s small, portable, and easy to use despite the lackluster attention that went into the app creation. You can always adjust your photos before printing to make them more true-to-color, but I find that it’s just too much work for such a small photo. The Zip definitely lacks the “instant” quality of the Prynt.
For me, I’ll stick with my Polaroid Zip for the bulk of my photo printing and save the Prynt for my next gathering. It’ll be a blast snapping random photos with friends and giving them a parting gift.
What photo printer would you choose?
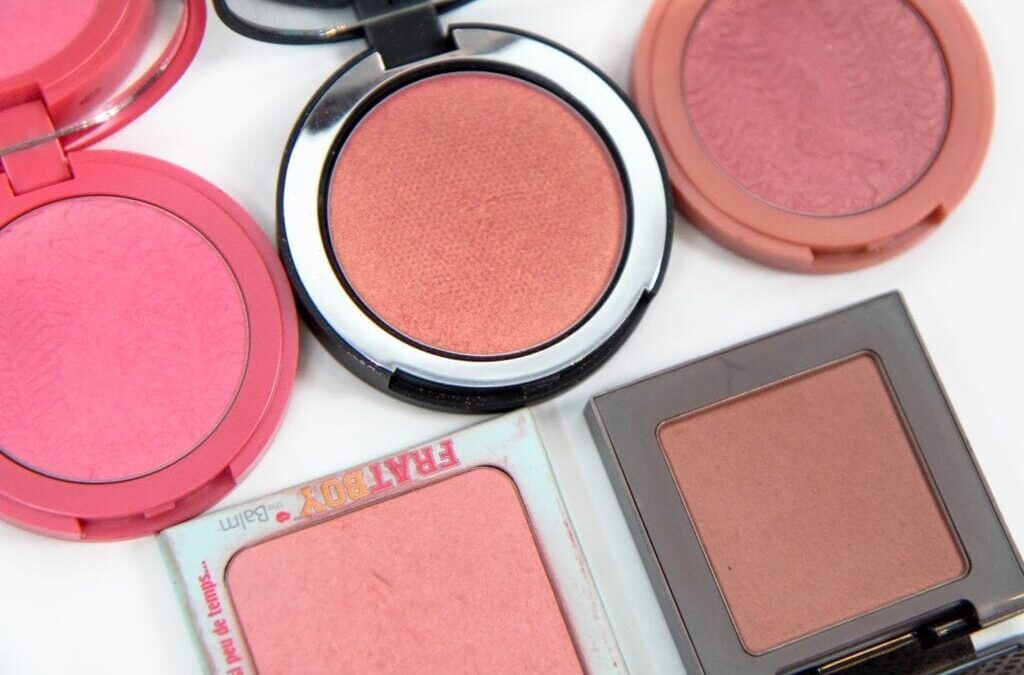
I’ve had a love affair with blush since I was a little girl. Clown cheeks were my specialty during dress up time and I rocked the brightest pink shades. Fortunately for everyone around me, I’ve toned things back a lot since then and have a much lighter hand. Blush still is a favorite in my makeup routine and there are five blushes I gravitate towards more than anything else.
I’ll throw it back to my younger days with this first blush. Everyone needs that bright pop of pink in their collection.
Tarte’s “Fearless” has been my go-to for the perfect flush of pinky goodness. Tarte is the brand I compare all blushes to for quality, pigmentation, and lasting power. They’re just that good.
The
IT Cosmetic’s Bye Bye Pores Blush in “Sweet Cheeks” is the newest addition to my collection but instantly became a favorite. It’s unlike any of the other blushes I’ve owned so it had to be included in this roundup. It’s packed full of glitter, but creates this gorgeous iridescent glow on the skin. Slightly on the mauve side, this blush is a fantastic transition from summer to fall makeup as it accentuates whatever tan I managed to get this summer while packing on the dewy radiance.
Of course another Tarte blush had to be added to the lineup. No shame. “
Peaceful” is a much more neutral shade I tend to wear on light makeup days to add a little bit of dimension to my face. It also has bits of glitter in it, but they never translate to the skin. Just a good ol’ fashion peachy blush shade good for all year round.
theBalm’s Frat Boy takes “Peaceful” and injects it with a bit of “Fearless” and probably is my oldest blush. I can’t ever seem to part with it though as it’s still going strong. The best summer peachy shade to add warmth to the skin while looking natural and effortless. It’s oh so good.
Urban Decay’s “Video” blush has been sitting quite on my shelves this summer waiting for its time to shine once fall and winter roll around. It’s the best colder month blush I’ve found for adding color back into my skin without looking too out of place on my pale winter face. It can be worn lightly or really built up to its fullest potential.
These five blushes cover all the bases, You’ll never be without the perfect shade and your blush collection will thank you for keeping it to a minimum. They’re all incredibly pigmented, long-lasting, and downright gorgeous. Add two or all of them to your collection. Go on, I won’t tell.