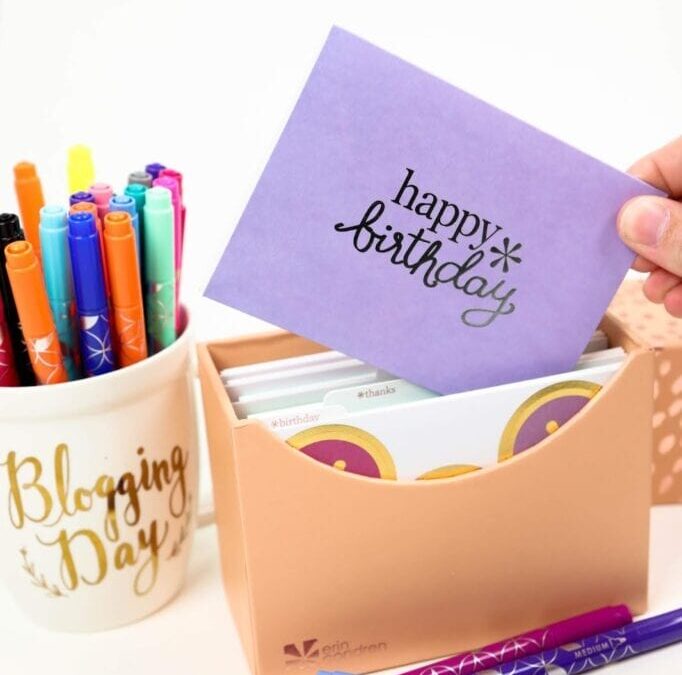
If you’re living that online life of posting videos/writing blog posts, affiliate programs are a great way to organically talk about products you actually use while getting some money on the side. It’s something talked about a lot in the beauty and lifestyle industry, but relatively unheard of in the planning community. There are so many amazing options out there for affiliate programs to increase your online revenue just by simply changing what links you’re using.
What’s even better is that all of my favorite planner affiliate programs use ShareASale as their platform. That way it’s super easy to keep everything in one place and you’ll get one paycheck rather than having to keep up with a ton of different accounts.
You’ll be able to view the programs descriptions and apply to join once you sign up for ShareASale(it’s free).
Once you’re a part of the program I highly recommend using the custom links option to take whatever product you’re talking about and make an affiliate link for it. That way you can direct your audience to exactly what you’re talking about. You’ll also receive emails about once a month for each program to give you updates on upcoming sales, discounts, and collaboration opportunities. The Erin Condren program specifically offers a lot of chances to “bid” on projects where they supply you with items to talk about during specific campaigns.
There are a ton of other planner affiliate programs out there, but these are my particular favorites and the ones I find myself linking to most often. If you have any questions about getting started with affiliate links, drop them in the comments and I can help you figure it all out!
For the longest time I just left the notes pages in the back of my planner empty. I’m definitely not an artist and didn’t want to mess them up with my crappy attempts at bullet journal-like spreads. I’m ashamed at just how long it took me to realize I could just make stickers…oh Kayla…
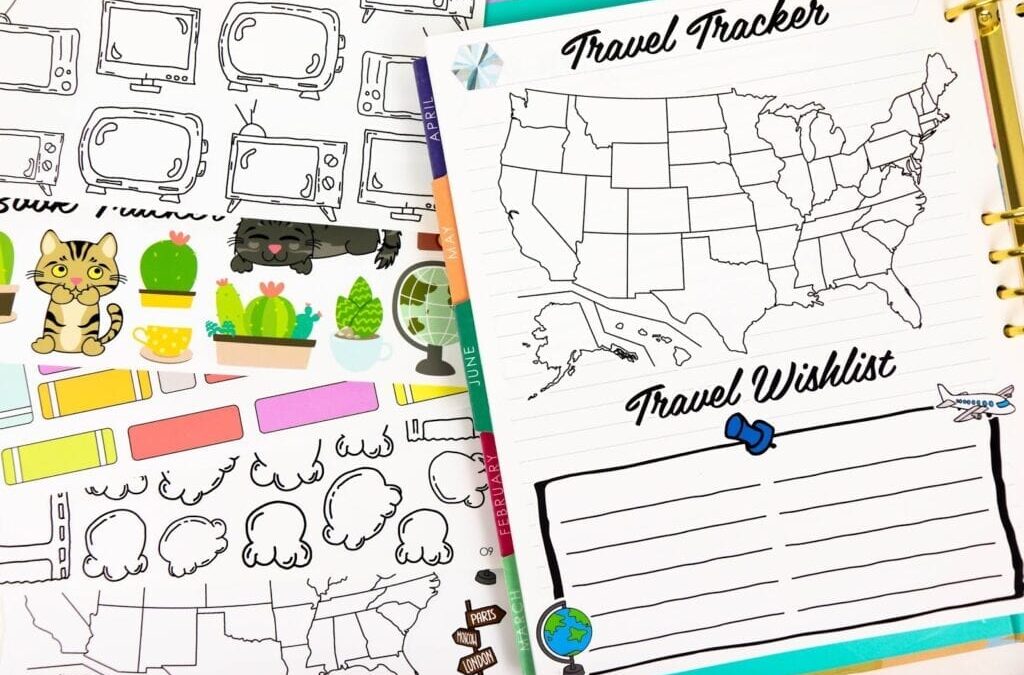
With all the travel I’ve been doing lately across the United States I really wanted to create a travel tracker and wish listof places I’d like to visit. I just add a little red dot on the map to indicate places I’ve been rather than coloring in the whole state. My hope is that over time I’ll have a chicken pox map full of amazing travel adventures!
When the new Erin Condren Life Planner(review here) dropped I completely hated the new monthly productivity page. I never have that many birthdays to track and I wasn’t a fan of the other header options. Plus I always love a good habit tracker. The ECLP monthly productivity page habit tracker and headers was born! If I want to mix up what headers I use each month I have six different options to choose from. Gotta love stickers that can make a planner perfect!
Another one of my favorite ways to spice up my notes section is with the build your own bookshelf book tracker. There’s just something about wanting to fill in all those book spines that gets a gal reading again.
I wanted a section for all my wish list items, but I like to divide them based on categories. Presto. Wish list notes page. That way I can add a header to the little sticky note looking sticker based on wish list topics.
Here’s a video of my notes section before I created the USA map and wish list sticker sheets! I also use these popcorn stickersand television stickers to track shows and movies I’d like to watch and you can see how I set that up in the video.
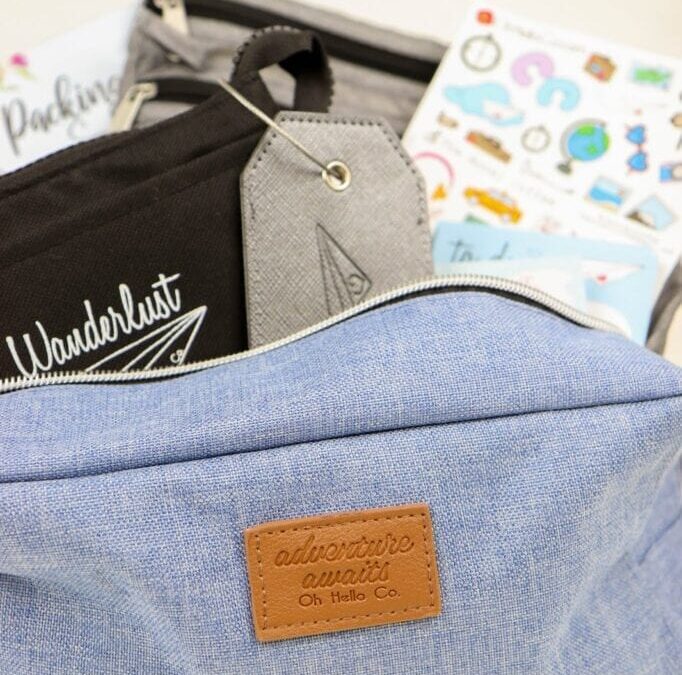
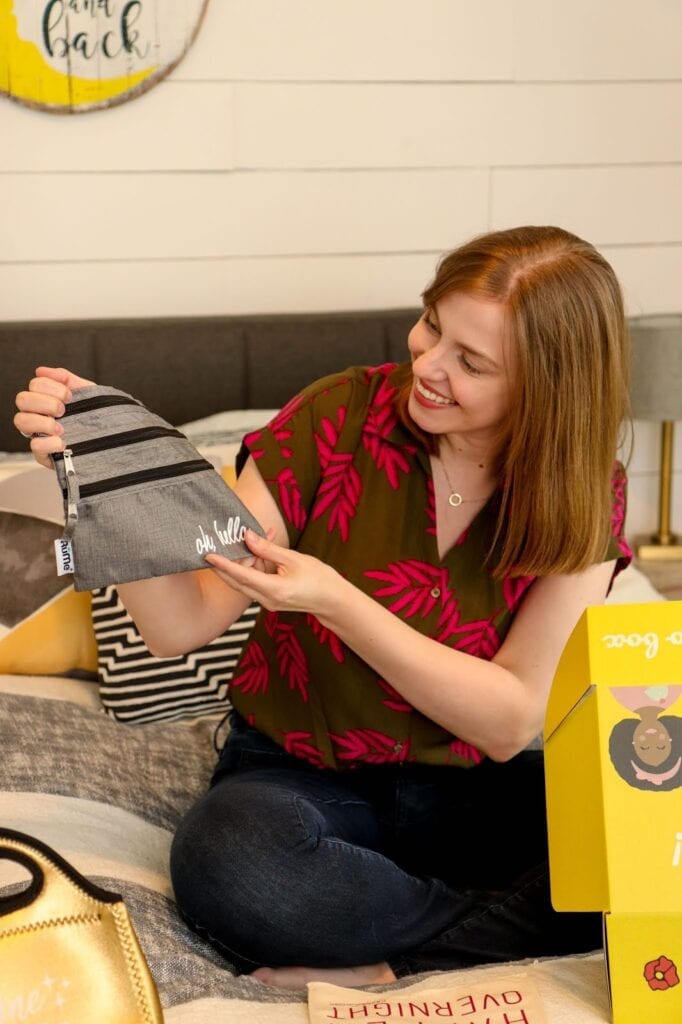
With more solo travel in the planner this year, it seemed like the perfect time for a travel Oh, Hello Box. Gotta have travel supplies, right? I wanted this box to have a ton of really useful travel related products. Whether you’re travelling international or taking a road trip, this box can help make your next adventure even better.
One of my favorite products in this month’s box is definitely this travel pencil case. It enlarges and zips closed to keep all of your writing supplies safe. When you want to use it, just push the top section down and presto, pens at the ready. The front little pocket is a great place to store sticky notes too.
I’m always losing my travel earbuds so this case should help me keep track of them better (and not tangled)! Sure I love my larger headphones, but sometimes I just need something small to throw in my carry on. I’ve used this three zipper pouch for a few trips already and it’s amazing at keeping my jewelry separate and untangled. The compartments are great at organizing things will still keeping everything in one place.
The Novel Coffee collaborated with us for this month’s box! Just look at those adorable kawaii travel stickers. I love all of the collaborations we’ve been doing lately and there are definitely more in the works for future boxes.
Be sure to check out the video to see everything in the June Oh, Hello Box available Saturday, June 1st!
Let’s get into the recipes first because no one likes to scroll through a mountain of text trying to find the recipe…I’ll see you on the other side…
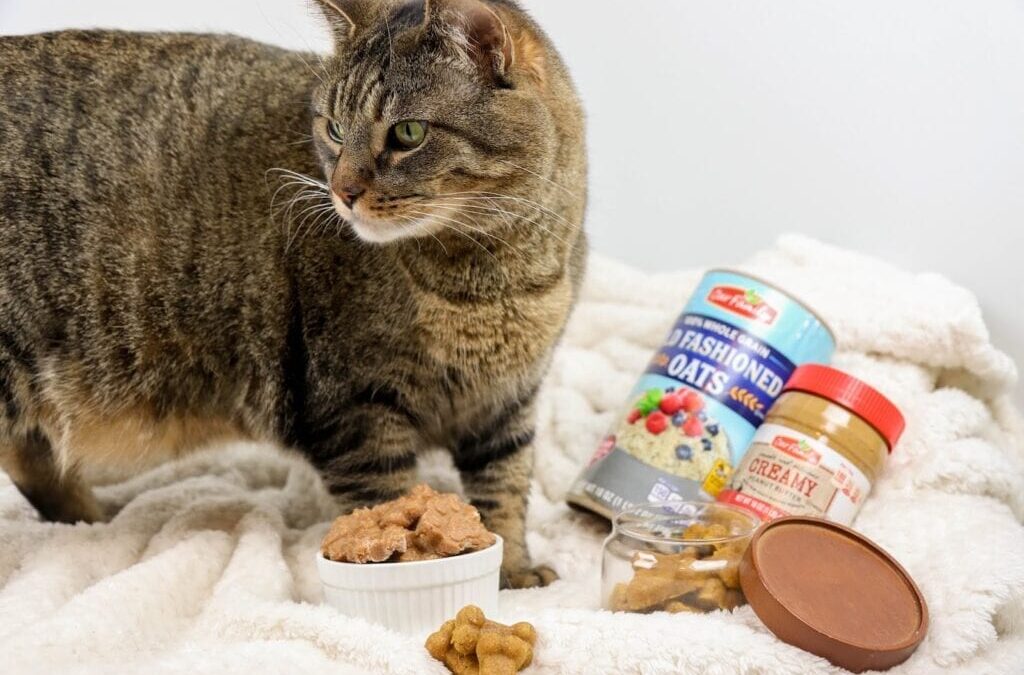
Homemade Three Ingredient Cat Treats
Ingredients
10 oz canned salmon or tuna undrained
1 egg beaten
2 cups whole wheat flour
Directions
Heat oven to 350°. Pulse 10 oz canned meat (undrained) in a food processor and chop as finely as possible. If you don’t have a food processor, use the back of a fork to break the meat into small pieces.
Combine meat, 1 egg (beaten) and 2 cups flour in a bowl until dough forms. If dough is too dry, add up to 1/3 cup water. If dough is too wet or sticky, add a bit more flour. Dough should be tacky but not sticky.
Roll out dough on a floured surface until about 1/4 inch thick. Use a 3/4-inch cookie cutter in the shape of your choice to create your treats. I used a silicone mold to make cat paw shaped treats!
Place treats on a parchment lined baking sheet and bake at 350° for about 20 minutes. When they’re slightly browned and crunchy, they’re done.
Homemade Four Ingredient Dog Treats
Ingredients
2/3 cup pumpkin puree
1/4 cup peanut butter
2 large eggs
3 cups whole wheat flour, or more, as needed
Directions
Heat oven to 350°.
In the bowl of an electric mixer fitted with the paddle attachment, beat pumpkin puree, peanut butter and eggs until well combined. Gradually add 2 1/2 cups flour at low speed, beating just until incorporated. Add an additional 1/4 cup flour at a time just until the dough is no longer sticky.
Working on a lightly floured surface, knead the dough until it comes together. Using a rolling pin, roll the dough to 1/4-inch thickness. Using cookie cutters, cut out desired shapes and place onto the baking sheet. I used a silicone dog bone mold.
Place into oven and bake until the edges are golden brown, about 20-25 minutes.
I’ve worked with Our Family* in the past on another baking postso I jumped at the opportunity to try some recipes for the furry guys in my life. Our cats seriously go nuts for treats, so I’m glad I now have a recipe that I know exactly what’s in it. You can pick up Our Family brand baking products at Family Fare or D&W if you’re in the Grand Rapids area. They’re affordable, high-quality, and are what I usually reach for when I’m grocery shopping.
Plus the Our Family peanut butter doesn’t contain any ingredients that are harmful to dogs. Just make sure to not feed any to cats as it’ll upset their stomachs.
After all of these treat filled photo shoots I’m definitely the favorite in this household. That’s for sure!
*This is not a sponsored post. I’m not being paid for this post and all opinions are my own. Our Family kindly sent over the products shown in the first photo to include in this post.
The Oh, Hello Box is six months old! Putting together the box every month is one of my favorite things about my job. Sure there are a few boring parts like budgets to deal with, but it’s mostly just a whole lot of fun.
When planning what goes into each of the boxes, I first look at current trends and any particular seasonal factors for each month. The summer is usually filled with grilling, travel, and lots of sun, so it makes sense to create boxes around those ideas rather than cuddling up with a nice book. I keep a running list of theme ideas in a notebook whenever something pops up in my head. So I look through that and decide on a theme before doing anything else.
Next is deciding on the budget and number of boxes for that month. We have a set budget for each box to guarantee we’re making good enough margins for the box to be sustainable. Plus we want to make sure we have enough boxes for growing demand.
Now comes the fun part. Once I have the box theme in mind (say…travel) I get to run with it. I’ll flip through countless promotional item catalogs my husband Alex keeps for his business. Of course there are a ton of items that would fall under the travel category, but I like thinking out of the box and seeing if I can incorporate items that don’t necessarily fall into the category on their own. That’s where designing comes in. I’m always on the lookout for practical items people will actually use rather than having stuff that’ll just take up space. The great thing about the box is how shareable it is. If there happens to be something you just aren’t crazy about, you can easily pass it along to a friend or wrap it up for a gift.
After my list of products has been roughly outlined, I start figuring out what I want on them. This is the point where the box really starts to take shape. A “meh” item can be turned into the most popular thing in the box if it has a really awesome quote or great design on it. I need to know what the items are before I start designing to make sure the designs make sense with each item and can work cohesively to the theme.
Honestly having a husband in the promotional products business makes assembling the box every month a complete breeze. I’m fortunate to have someone who is constantly up on the most popular items and coolest gadgets that we can share with all of you.
If you have any questions about what it’s like to put a subscription box together every month, drop them in the comments!